How to achieve a professional wood veneer application using spray adhesives: A step-by-step guide
The vast majority of lamination that takes place in the furniture manufacturing industry is done with man-made laminates like HPL or vinyl. These materials are cost-effective, easy to work with, and available in a huge range of realistic wood effects.
But when it comes to achieving that luxury look, there’s no substitute for real wood – and real wood veneers allow joiners and fabricators to create the look of real, solid timber without compromising on design freedom.
Let’s take a look at why real wood veneers are used in furniture and shop fitting manufacturing, and how spray adhesives can make the process much more efficient.
Why use real wood veneers?
The beauty and character of natural wood is undeniable. With its tactile surface and endless grain variations, using real wood means no two pieces will ever be identical – and when treated with care, the beauty of this natural material endures for many years.
Solid wood furniture remains in big demand, but there are two main drawbacks to manufacturing in solid wood.
The first is cost. Furniture-grade timber is a premium product and the cost has skyrocketed in recent years, making it an expensive choice for furniture and fittings.
As well as the added cost of the raw material, solid wood is more challenging to work with and therefore labour costs also tend to be higher.
The second drawback of using solid wood for furniture manufacturing is the limitations of the material itself. Solid wood is a porous material that is vulnerable to changes in temperature and humidity. It expands and contracts, and may warp over time, making it unsuitable for certain environments, especially in the commercial sector.
To avoid this, joinery manufacturers use MDF (medium density fibreboard) in place of real timber, because it’s much more stable and resistant to moisture. MDF can also be used to create unusual shapes and designs that would be difficult in solid wood. Applying a real wood veneer to the MDF gives the appearance of real wood, with none of the drawbacks.
.jpg)
What are the types of real wood veneer?
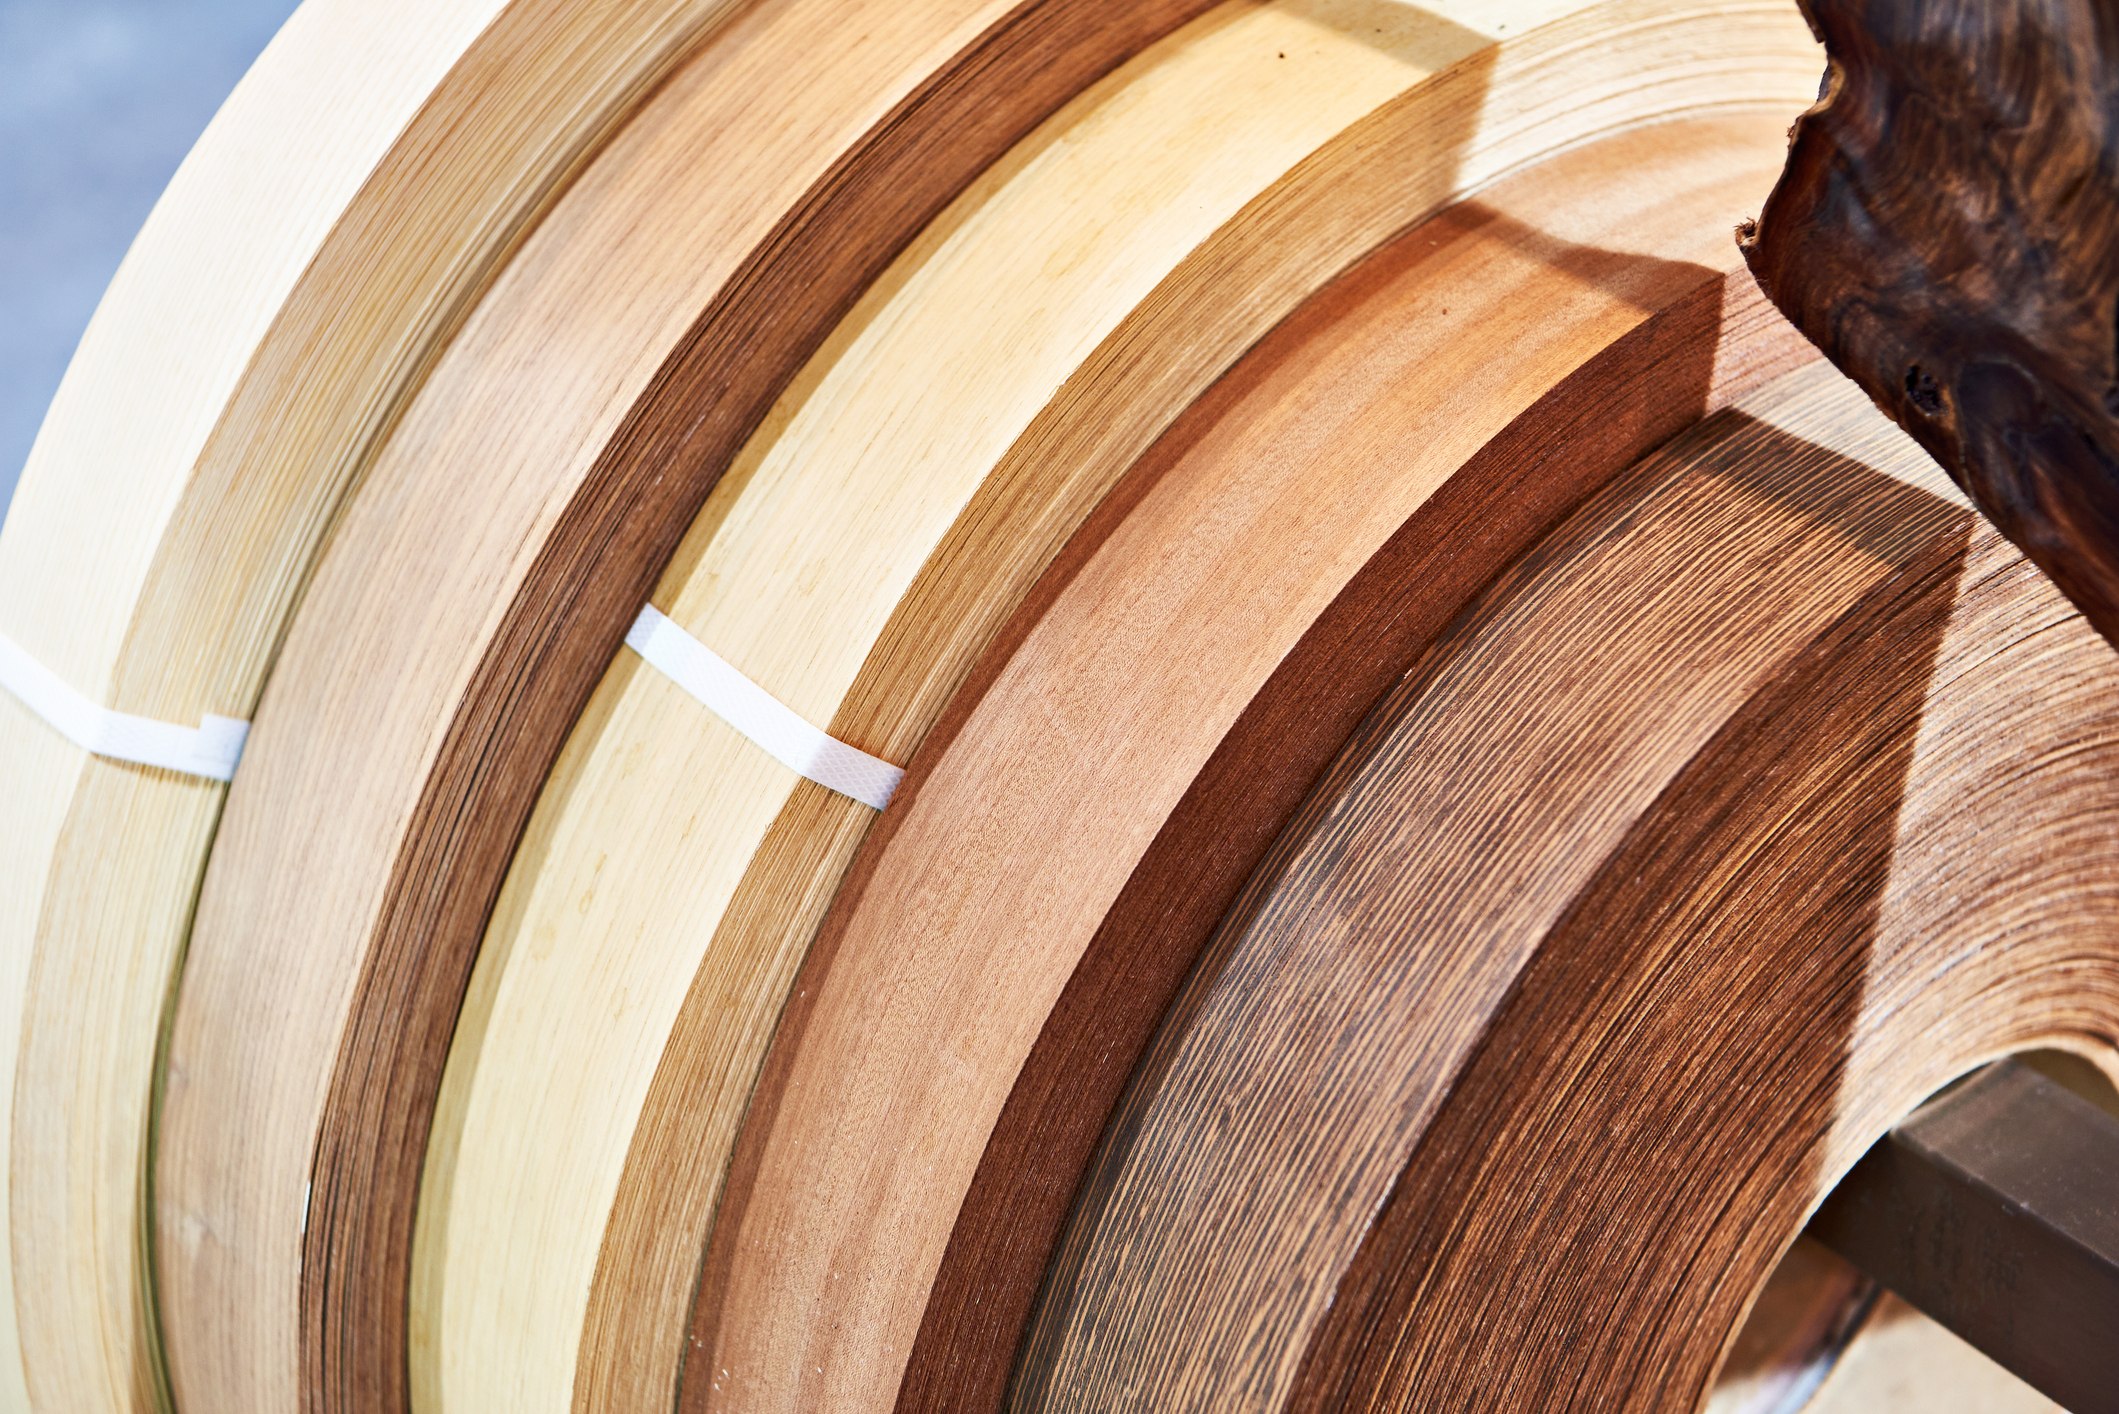
There are as many types of real wood veneer as there are types of tree, from common species like oak through to exotic hardwoods and stunning burled timbers. Each tree species has its own unique characteristics in terms of appearance, but also in terms of how much natural moisture and oil the wood retains.
Regardless of type, however, all wood veneers fall into two main groups – backed, and unbacked.
What are unbacked veneers?
Unbacked veneers are simply raw sheets of very thin timber taken from a larger plank or log. They come in individual pieces, which can be irregular in size and shape, or in sheets. In fabrication, it’s most common to find unbacked veneers in sheet form, created in a process called leaf matching where thin strips are taken from a large plank of the timber, flipped to match the grain, and then stitched together.
What are backed veneers?
Backed veneers are sheets of wood veneer that have been joined together by attaching them to a very thin backing layer. This can be made of paper or fleece, or sometimes even a man-made laminate. Backed veneers are generally more robust than unbacked.
Choosing an adhesive for real wood veneer
As mentioned previously, real wood veneers are still real wood, with different levels of oil and moisture. As such, real wood veneers will behave like real wood when exposed to changes in temperature or moisture level. For this reason, it’s extremely important to choose the right adhesive when bonding real wood veneers.
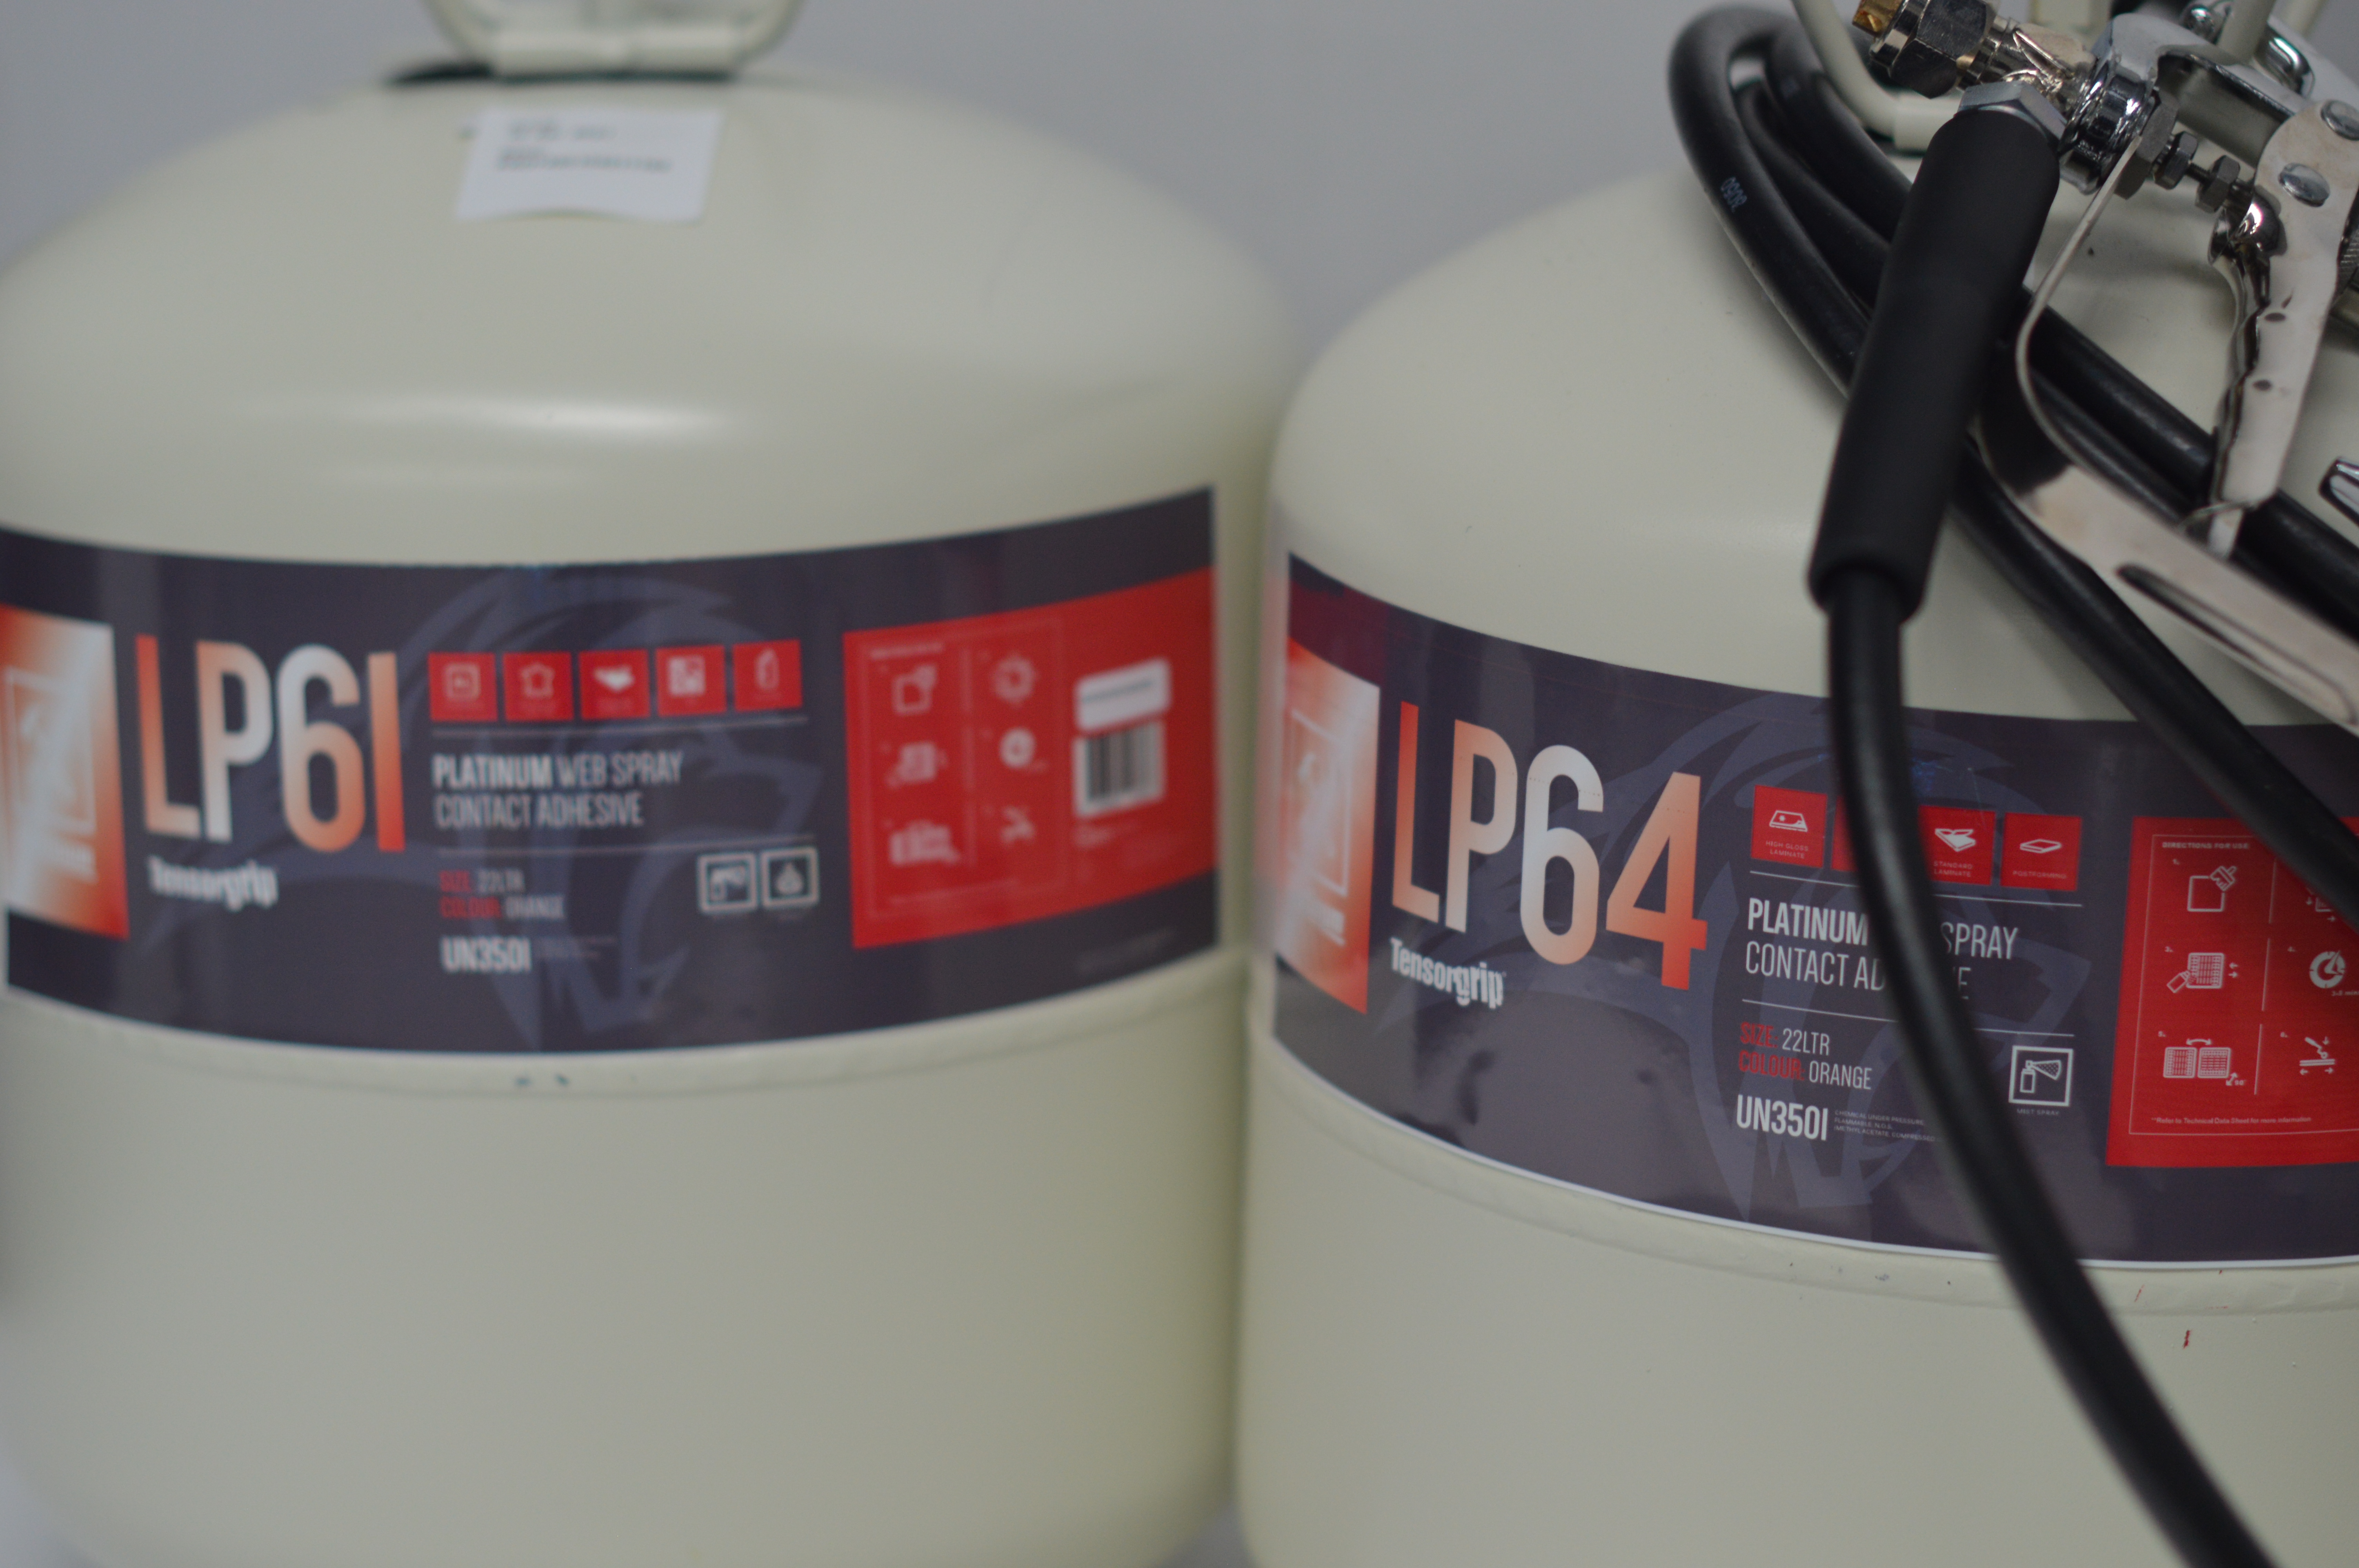
Real wood veneers need to be bonded down rigidly in order to prevent them from moving. In the case of unbacked wood veneers, this must be done using a structural adhesive such as a two-part cascamite resin or PVA. This gives the veneers the lateral stability required for a professional, durable finish. As such, Tensor adhesives are not recommended for the application of raw, unbacked veneers.
Backed veneers are much more commonly used in the commercial manufacturing sector because they are more stable and easier to apply. For applying backed wood veneers, we always recommend the use of Tensor Joinery’s LP64 Platinum Mist Spray Contact Adhesive.
How to apply real wood veneers using spray adhesive
Achieving successful bonds and a professional finish on your real wood veneers is all about the process – and when you use spray, you can make that process much simpler and faster, as long as you follow the correct procedure.
All spray adhesive contains moisture in the form of solvents. If this moisture comes into contact with the wood veneer, it will cause it to swell and potentially warp, resulting in issues like bubbling, cracking and even bond failure.
With a backed veneer, the backing forms a barrier that prevents moisture from coming into contact with the wood. But since the backing is very thin, you must still follow a careful application process in order to achieve perfect results. Here’s a step-by-step guide:
Step 1: Choose your adhesive
Choose a mist spray adhesive such as our LP64. Mist sprays deliver a much finer, lighter and more consistent coat weight compared to web sprays. This improves the consistency of adhesive contact across the surface being bonded, and reduces the risk of telegraphing (where the adhesive pattern is visible under the thin veneer).
Step 2: Apply a prime coat
Prime coating is simply the application of one coat of adhesive to the veneer and the substrate that is allowed to dry without bringing the surfaces together. This prime coat acts as an additional barrier, preventing moisture from reaching the veneer during the bonding process. Get tips on how to apply TensorGrip adhesives here.
Step 3: Apply adhesive coat
When the prime coat is dry, you can then apply a second coat of adhesive to both surfaces, and bring them together for bonding. With Tensor LP64 the surface can be rolled mechanically or by hand – and that’s all you need to do. There’s no need to place the finished panel in a press, because the adhesive is designed to offer instant, permanent grab and a rapid curing process.
Step 4: Leave to cure
Allow 24 hours before applying solvent-based lacquers or finishes. This ensures that the adhesive has fully cured.
Step 5: Apply lacquer
Careful lacquer application is vital because lacquers also contain solvents. If these penetrate through the veneer and the backing to the adhesive layer, they can cause the adhesive to release. Many manufacturers are accustomed to applying a single, heavy ‘flood coat’ of lacquer to their wood veneers, but when you use a spray adhesive, it’s vital to apply several, very thin mist coats of lacquer, allowing each one to dry before applying the next.
This process takes time, but is still much faster than using a resin or PVA adhesive that requires pressing for 8+ hours before it can be lacquered.
In summary
As we’ve illustrated in this blog, switching to spray adhesives to wood veneer application can save significant time and effort, making a complex process less labour-intensive – but it’s vital to follow the process we’ve outlined in order to achieve professional results. To find out more about our LP64 or other products in the Tensor Joinery range – or if you have a specific question related to veneer applications – get in touch with our technical team.